


How to Install Ecoraster Grids for Different Uses
Installing Ecoraster starts with the right base, then the right layout for your site. These short videos walk through the essentials of preparing the ground and laying interlocking grids, followed by the technique for curves, circles, and equine walkers. Choose the section you need and keep the installation guide handy for the specifications that apply to your project.
The Essentials
Start here for the steps that apply to most Ecoraster installations, from driveways and parking areas to paddocks and barn entrances.
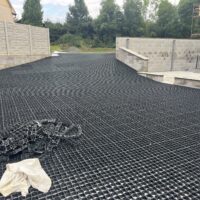
- Prepare the site and build a suitable gravel base for the expected use.
- Compact and level the base before laying the grids.
- Start at a corner, connect the pre-assembled grids, and work outward.
- Cut grids to fit edges where needed, then fill the cells to the top of the grid.
A well-prepared base helps the finished surface stay stable and perform as intended.
Mastering Curves, Circles & Walkers
Curved layouts need a change in grid direction. This video shows how to plan and install Ecoraster around equine walkers, round pens, curved paths, and similar features.
- Build a circular layout one quarter at a time, rotating the grid 90 degrees clockwise between quarters.
- Keep the T-shaped connectors pointing toward the inside of the curve.
- Apply the same direction change when the layout bends along a path or road.
- Check the layout as you go so the grids follow the intended curve.
The details of your base, grid layout, and fill will vary with the ground conditions and how the surface will be used. Use these videos alongside the installation guide, and call 1-800-495-5517 if you need help choosing the right approach for your project.
Any Questions?
Call Ecoraster: 1-800-495-5517