
How to Build a DIY Patio That Never Pools Water: 3 Sustainable Ideas
3 Creative Design Ideas and the German-Engineered Secret to a Lifetime of Maintenance-Free Drainage.
How do I build a DIY patio that looks great and never pools water?To build a DIY patio that drains, use a stable subgrade, a clean angular stone base, and a permeable grid like Ecoraster. This system prevents water pooling by allowing it to soak into the ground rather than sitting on a solid slab.
Why build a patio twice? Most DIY projects look great on Day 1, but fail by Year 2 because the engineering below the surface was ignored. Our systems are built to last 20+ years – watch why the foundation is the only part you can’t afford to skip.

Summer is here, and for homeowners and light commercial property owners alike, that means it’s finally ‘Build Season.’ It’s the perfect time to turn that underused, perhaps slightly muddy corner of your yard into a functional outdoor masterpiece.
But before you pick up a shovel, it’s important to realize that the most common DIY mistake isn’t the choice of stone – it’s ignoring the engineering beneath it.
While standard patios are often built as ‘one-way streets’ for water, leading to the ruts, sinking, and surface pooling that can ruin your investment by next spring, Ecoraster allows you to think from the ground up.
For patios, garden paths, driveways, and outdoor living spaces, Ecoraster’s residential permeable paving applications show how the system can support better drainage without limiting the finished look.
In this guide, we’re moving beyond textbook definitions to show you how to let your creativity rule with design ideas that don’t just look great, but provide a permanent, maintenance-free drainage solution that works with the natural water cycle.
3 DIY Patio Design Ideas for Permanent Drainage and Style
Ecoraster gives you more flexibility than a poured slab because the grid can be finished with different infill materials – providing a permanent, maintenance-free drainage solution. You can lean clean and modern, soft and green, or rustic and gravel-based while still building on a permeable structure designed to move water through the surface.
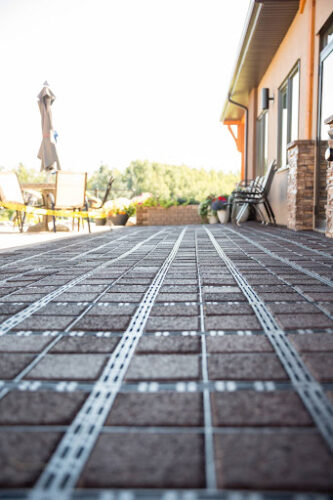
| The Modern Look (Ecoraster Bloxx) Ecoraster Bloxx combines the strength of a grid with the look of premium concrete or rubber pavers. It is a strong fit when you want a polished patio surface without giving up permeability, especially for walkways, courtyards, and accessible outdoor spaces. |
|
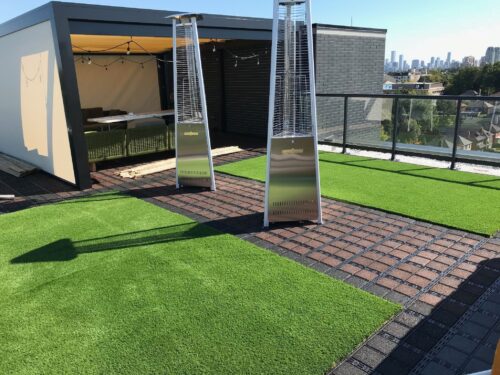
| The “Living” Patio Fill your grids with a durable substrate and sedum or moss or synthetic turf. This creates a lush, green “sponge” effect that helps rainwater move down through the surface instead of collecting on top. |
|
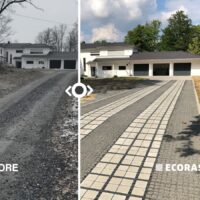
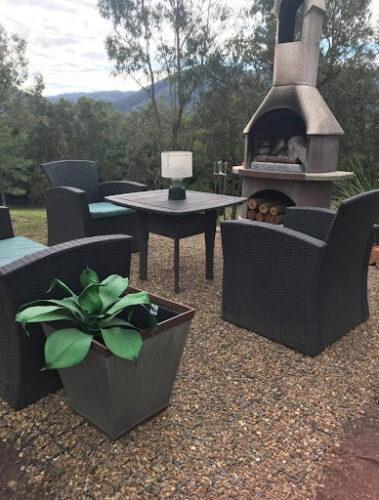
| The Seamless Gravel Filled Patio This shows an Ecoraster grid with gravel. The grid locks everything in place, giving you a clean, stable patio where the gravel in the grid won’t shift or get washed away. |
|
Why Good DIY Patio Ideas Fail Without Drainage
It’s the same reason heavy-duty industrial yards fail – ignoring the engineering beneath the surface. Ecoraster brings the same 70,000 lbs/sqft capacity used at Amazon logistics hubs to your backyard patio.
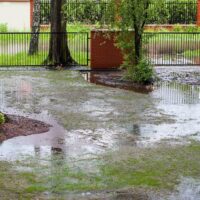
Most patio failures do not happen because the surface looked bad on day one. They happen because water has nowhere useful to go.
A solid slab, poorly compacted gravel base, or tightly packed surface can trap water near the top of the patio. Once that happens, the surface starts reacting to every season. Rain creates soft spots. Freeze-thaw cycles open gaps. Furniture legs settle unevenly. Gravel migrates into the lawn. Pavers start to rock.
The most common warning signs are easy to spot:
- Pooling after rain: water sits on the surface instead of draining down
- Ruts or dips: the base is moving or settling under load
- Loose gravel: the surface material is spreading beyond the patio edge
- Muddy edges: soil is mixing into the drainage layer
- Ice patches: trapped water freezes where people walk
The fix is not always more gravel. Adding more stone only hides the drainage problem for a season; Ecoraster fixes it permanently.
Understanding the benefits of permeable paving helps explain why drainage, base design, and surface reinforcement matter more than simply adding another layer of material.
In many cases, adding material only hides the problem for a season. A better DIY patio starts with a base that stores and moves water, then uses a reinforcement layer to keep the finished surface locked in place.
That is where a permeable grid system changes the build. Instead of asking the top layer to do all the work, the full patio assembly supports drainage, load distribution, and surface stability from the ground up.
How Do I Ensure a Successful DIY Patio Installation? 5 Professional Steps
To ensure your patio performs as well as it looks and lasts for 20+ years, follow the anatomy of a professional installation:
- Step 1: The Floor (Subgrade): Clear out organic “muck” and pack the natural soil tight. If the floor is soft, the patio will sink.
- Step 2: The Filter (Permeable Geotextile): A tough fabric layer keeps your clean stones from mixing with mud over time.
- Step 3: The Reservoir (Base): Use “clean” angular stones (no dust!). This layer acts as an underground tank, storing rain until it can soak back into the earth.
- Step 4: The Backbone (Ecoraster Grid): Lay the pre-assembled layers and “step down” to lock them. This spreads the load and prevents rutting.
- Step 5: The Finish (Infill): Fill with stone or seed. Ecoraster is 95% open, providing more drainage than any traditional paver.
The Bottom Line
Don’t let your summer project become next spring’s costly repair. Download our professional guides to ensure your site is engineered for global standards of performance and sustainability.
Our product recommendations for DIY patios